Pages

Saturday, 25 January 2014

Gum Paste/Fondant Roses

Sorry for the lack of posts this week, we did end up having to put my dear baby girl down, so it's been an up and down kind of week. She will be missed, remembering all of the amazing times she's given me, funny times, and the times that she's been my shoulder to cry on. We were lucky enough to be able to bring her home, so she has been laid to rest in the backyard where she grew, and where she can roam and visit us as she pleases...which she has done a few times already (yes, I believe in things like this).

I had no choice but to get busy today as I have an incredibly busy week ahead of me. I needed to get my roses done today for the cake sampling on Thursday, so they would have time to dry. Also for me to get the colours down as well. I have 2 different greens and I also have 2 different reds, but it took both reds to make the colour I was looking for. I hope it's the colour she is looking for too!

Instead of just doing straight Gum Paste Flowers I did a mix of Gum Paste and Fondant. This way they won't be as brittle as straight gum paste and I'll be able to play with them a bit more.

Here is the process (Thank you to my little sister for all the help she gave me today, and being a great photographer getting everything she could!)

Get all your colours made, wrapping them in saran wrap to make sure they don't dry out.

Roll out white. Using cutters make a medium circle. Then cut in half.

Roll each half into this shape (pointed at one end, large at the other), making sure it's roughly the width of one petal. Stick the large end onto wire, or use DRY spaghetti like I have. 


Roll out one of the greens to start making leaves. (likely won't need all of them, but mine are for samples.)


Once you have all your leaves cut, remove the excess gum paste/fondant. Begin texturing the leaves, then form them in the shape you want. I have mine (4th picture), in a rounded sheet. 


Do the same with the other Green you have (or if not, just skip this!)


Now on to the flowers. Roll out your flower colour, in my case red. Cut out as many flowers as you can. Placing them on a Gum Paste board (I had 2 layers full).


Once ready to use, bring out each flower, one at a time. Cut the flower down where each petal meets, not too far, about a centimeter if you can without cutting all the way. Roll the edges with a ball tool, ruffling them. Grab your centers (which you made earlier with white on spaghetti), stick the spaghetti through the center of the flower form, and start layering as follows.


Use as many flower forms, or as little. The small one (rose buds) take 2-3 flower forms, where as the large roses can take anywhere from 5-8. My large ones have 7 flower forms on them. 

I did taste a little of the leftover Gum Paste/Fondant mix and for some reason the flowers had a funny taste to them compared to the rolled mix. I'm wondering if it's maybe the Gum Paste Board I used, or whether it was maybe the colouring. I'll have to try it out tomorrow. Manda, if you see this you were warned! haha! I will get it fixed don't you worry! I am hoping this is around the right colour red that she is looking for!

I am working on some sketches of ideas I have for the cake, so hopefully one will work! We'll get it all sorted out! I'm super excited, and it's just the distraction I needed today!

Just remember, these flowers need to sit to dry for at least 2 days. Since I used Gum Paste/Fondant mixed together mine won't fully harden like just straight Gum Paste.

Saturday, 18 January 2014

What a Change!

Sorry about the delay in posts, it's been a busy, rough week. We thought we were going to have to put our dog down on Friday (yesterday), so it's been a rough ride, but my baby girl is still here. Well not so much of a baby girl...a nearly 17 year old, mostly deaf, almost blind, and skin and bone baby girl. I knew this time would come eventually, but nothing is preparing me for it. She's been through everything with me, including the loss of all of my friends...all 34 of them. She's been my shoulder to cry on, my joyous times, and my rock. She knows when something is wrong, she knew when my mom was pregnant with my sister before my mom did. Nikki has been the best pet anyone could ever ask for and we were so blessed that she chose us. Anyways, she is still here with us for the short time she has left and we'll cherish all of those 17 years worth of memories with her.

Now, on to a happier note before I get crying again...It was a week yesterday since I did my It Works! Wrap. I decided it would be a good idea to re-measure myself after a week, just to see how much has changed. Well I did a few other measurements throughout the week too. I also decided to portion my foods better (I haven't been all that hungry anyways), and I've been doing Zumba as well for a 1/2 hour everyday. So here are the measurements from start (before the wrap) to "finish" (but not actually finish, just a week later!) :) W = Waist  T = Tummy (at the Belly Button)  H = Hips

           Start       45 minutes       5 hours      12 hours     

W       35.5              35                     35            34.75            

T         40               38.5               37.75             38                 

H        41                41                   41                40                   


       24 hours        72 hours       5 days         7 days

W      34.75               34                 34                34

T       38.5                37                  38              36.5

H       41                  41                 40               39.5


SOOOO... In total I've lost 1.5" off my Waist, 3.5" off my Tummy, and 1.5" off my Hips. Overall, I couldn't be happier! It's the best I've felt in a long time. I've also lost nearly 10 lbs. I do hate the fact that I've had to resort to using weight loss help in this way, but with health problems running through my family, both heart and cancer, I needed to make a drastic change. Not just for me, to help me feel more like me, but to also get in shape and get healthier, just get there to where I want to be. So it's been a big change, eat better and less, working out and all in all trying to change my attitude about everything.

Indeed a big change for me! I'll have more to come this week, this will be a busy week getting ready for the following week! I'm so excited! I have my Safe Food Handlers Course Certification on the 28th and 29th, the 30th I have the cake sampling for the wedding cake people, then on the 31st a few of the girls from work and I have decided that we need an evening out just to relax and shoot the sh*t so to say. That next week will be crazy busy! I will try and post this week as much as I can :)

Please feel free to ask questions if ya'll have any!

Tuesday, 14 January 2014

Cake Pops :)

I've made Cake Pops once before...actually they were more Brownie pops, and they were big, too sweet, and just too much to handle!

Over Christmas I bought a few Cake Pop molds and I figured "What the hay, I'll make some with the frozen cake leftovers I have in the freezer!"...so that's what I've done! They actually didn't turn out that badly either :) Yay me!

Here's how I did them, start to finish...

Start by making a simple cream cheese icing (or whatever icing you would like)
1 pkg Cream Cheese (softened)
1/2 tsp Vanilla extract
1/4 cup Butter (softened)
1 cup Icing Sugar


Next grab your frozen cake and crumble it to...well crumbs! This will get messy so make sure you have a cloth or do it near the sink so you can wash your hands after.


Grab 1 cup of the icing that you made (just rough it, I added a little bit more) and add it into the cake crumbs, mixing it so it's a big sticky mess!


Grease your cake pop mold. I used Pam, it was the easiest thing that I had around.


Fill both sides of the mold with the cake mixture. Don't add too much (that was my mistake), but also make sure you have enough in each side that when you push it together that they will stick and make one solid cake pop.


Push the 2 sides together, and clamp it shut. Put it in the freezer for a few hours (or in my case overnight), to let the cake push together. Working with it frozen is easier too.


Once you have it out of the freezer, pull the top off gently. You will notice that there will be some extra cake that pushed out when they formed. Gently push in the cake pop sticks and remove the cake pops from the mold. Take off the extra cake to make it round (or the proper shape of whatever mold you are using).


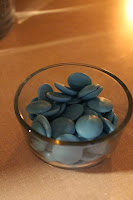
Melt Candy Wafers(Melts), or Chocolate Wafers in a small bowl 30 seconds at a time, stirring, until done. Dip the Cake Pops into the Chocolate, covering all of it. Place in Cake Pop rack (or in my case a cardboard box) to let dry (10 minutes).


Then grab a second colour Wafer/Chocolate and decorate as you please OR just leave as is and serve.


I had some fun with the decorating part!

Hope you enjoy your Cake Pop making :)

Please feel free to comment...suggestions, ideas, anything :)

Monday, 13 January 2014

Big Job!

Well, I can't say I've been busy making things...but in a way I've been super busy. I've got 2 big cake orders for this year. One is still in the process and the other set in stone. The one that is set in stone is for the little girl, Kalleigh, that I often get to babysit. Her birthday, in June, will no doubt come fast...just like 2013 went. Seriously, how is it 2014 already! So I've been researching ideas and finding some really cool ones that she would love...Team Oomie Zoomie or however it's spelled...Princess cakes galore...Mike the Knight...Strawberry Shortcake and oh so many more!

Now the other cake that is in the works is Kalleigh's older sister's (my age) Wedding Cake. I'm super excited about it! She wants a simple white iced cake with red roses for 100 people, so 4 tier. I'm back and forth with again so many ideas running through my head, but there's one style that keeps coming back to me. Roses starting at the bottom and working their way beautifully up to the top of the cake. She's unsure whether she wants Fondant (which I think would be easiest), or she made the suggestion of Whip Cream Icing. I'm not sure how well the Whip Cream would stay hard. I think it would soften too much, in turn making the Roses all slide off the cake. After all, Whip Cream Icing is basically all whipping cream. So I am going to play around and see what happens with it over a few hours, then maybe an afternoon if I notice the couple hours works! But it's all in game at the moment!

Anyways, the other things I've been up too...hmmm. Well I started a weight loss wrap thing, and it feels fantastic! Honestly within 45 minutes I had lost 2 inches around my tummy! Lord did I need that! I know I've said time and time again that I would never do anything like this because I personally believe it will all come back right after you stop using the product. I've search this place back to front, it's all natural, it's still hounding my system 3 days later, and I'm still feeling great. Now the thing that I'm going to do along with it is exercise and eat right. I'm only going to "treat" myself once in a while. Maybe on the weekends I'll splurge and have a little something, but other than that this is my NEW YEARS RESOLUTION. I have to stick to it. I need to stick to it. So that's my long term resolution is to keep at it and feel better about myself.

I've also been looking into some courses, the local Garden Club is holding classes every Tuesday this next month, so I'm thinking maybe I'll be able to do some of those, as my Wilton Course 4 was cancelled. Then there's a Safe Food Handling course with our local Fair committee. I was hoping to do that, but I'm not sure whether I'll be able to get a Wednesday evening off of work, as it's a Tuesday and Wednesday evening. I'll beg, but I'm sure she won't give it to me off. *rolls eyes* This place'll kill me yet, Darla!

It's been a never ending clean up of my room as well. Trying to get rid of some old things so I have room to store all these crafts that I'm making! I'll hopefully be able to set up somewhere this summer on weekends or something and sell what I make. I'll hopefully be able to get a few Christmas Craft Shows booked in too. I just have a good feeling about the things that I'm making. Maybe because I've got a better attitude about me lately!

So in the midst of cleaning my room I had to take down some picture frames. I pondered about selling them as they were, but then I got to thinking "why in the hell would I do something like that?!...Why don't I fix them up all fancy like and sell them! Getting side tracked from cleaning my room...I've been working on them...the only problem is I ran out of the paper I was using for them and I can't find it anywhere! Michael's has been useless to me these last 2 weeks! I'm usually always finding things in there and having so much of it I dunno what to do with it, but this time it's been different. I've been debating about mixing up the papers and having them all different, or instead of doing a set of 6, do 2 sets of 3, or maybe even 3 sets of 2...I just don't know how well it will workout with the words I have chosen for the frames! UGH!!! Anyways...here's a picture of the first one that I've done


Sunday, 12 January 2014

Fun Wreath

Well seeing as today was one of my days off this week I figured I would put some final touches on the wreaths that I made so that they are ready to sell, or just be hung around the house next Christmas.

In total in 2013 I've made 4 wreaths, 2014 just 1 so far...with the final touches on the others.

I did a little DIY with the last one I did (not this one), so you will be able to see how I put that one together.

This one, along with the other Christmas wreath that I posted, I just placed and arranged the way I liked it. It's not all that hard, but you have to know what it too much and what is too little.

Here she is my last wreath made in 2013


The way I have it to hang, is the long pink mesh you see at the top of the last picture there. Yes, I do know, it stretches when it hangs, but it's a small enough wreath that it won't look funny hanging from the door.

Again, please please please, comment and let me know if you are reading, even if it's just a HI...or something! I'd love to know who is reading if anyone at all!